Installing wall-mounted ceramic bathroom accessories involves several clear steps to ensure a sturdy and appealing finish. By following these seven quick steps, anyone can enhance their bathroom effortlessly with high-quality ceramic accessories while ensuring lasting durability and aesthetic appeal.
Table of Contents
- Gather All Necessary Tools and Materials
- Checklist for Tools and Materials
- Planning and Preparation for Installing Ceramic Accessories
- How to Measure Correctly Before Installation?
- Wall Drilling Techniques for Bathroom Accessories Installation
- What Depth Should You Drill Into Ceramic Tiles?
- Securing Wall Anchors for Bathroom Accessories
- How Much Weight Can Wall Anchors Support?
- Attaching and Aligning Ceramic Accessories
- How to Align Wall-Mounted Accessories Properly?
- Final Touches and Quality Checks of Your Work
- How to Check if Accessories are Securely Mounted?
Gather All Necessary Tools and Materials
Essential tools needed for installing bathroom accessories include a drill, level, screwdriver, tape measure, and wall anchors. Purchasing high-quality ceramic bathroom accessories sets is possible at Home Depot and Lowe’s, where a variety of styles and brands are available. For installation efficiency, organize tools and materials by type and function, creating an accessory sets organization system. Notable bathroom accessory brands like Kohler, Moen, and Delta offer durable and stylish options for ceramic bathroom accessories.
Checklist for Tools and Materials
A complete checklist for bathroom accessory installation should include a drill, level, screwdriver, tape measure, wall anchors, and screws. A detailed checklist ensures you have all necessary items for ceramic accessory installation. Safety gear like goggles and gloves is crucial for protecting yourself during installation. Specific tools like a tile drill bit and wall plugs are essential for installing wall-mounted bathroom accessories effectively.
Planning and Preparation for Installing Ceramic Accessories
Consider the layout and functionality of your bathroom when planning the installation of ceramic bathroom accessories. Prepare the bathroom wall by cleaning and marking the spots where accessories will be mounted. Common mistakes include not measuring properly and using incorrect wall anchors, which can damage the wall or cause the accessories to fall. Measuring is vital to ensure accurate and secure placement of bathroom accessories, as it prevents misalignment and other installation errors.
How to Measure Correctly Before Installation?
Tools needed for accurate measuring include a tape measure, level, and pencil. Ensuring your measurements are precise for ceramic accessories involves double-checking distances and using the level to maintain alignment. Steps for measuring placement include marking the spots on the wall, verifying distance from other fixtures, and assessing height for accessibility. Tips for avoiding measurement errors include using a helper for holding tools and rechecking measurements before drilling to avoid misalignment.

- Saves floor space
- Easy to clean and maintain
- Can give your bathroom a fresh look
- Attachments like soap dishes and towel holders are convenient
- Durable and long-lasting material
- Varieties of styles and colors
- Helps keep the bathroom organized
Detailed Breakdown of the 7 Quick Steps to Install Wall-Mounted Ceramic Bathroom Accessories
| Step | Description | Tools | Time (mins) | Difficulty (1-5) | Important Tips |
|---|---|---|---|---|---|
| Step 1 | Mark Locations | Pencil | 5 | 1 | Use a level |
| Step 2 | Drill Holes | Drill | 10 | 2 | Use masonry bit |
| Step 3 | Insert Anchors | Anchors | 5 | 1 | Tap gently |
| Step 4 | Attach Brackets | Screwdriver | 10 | 2 | Tighten firmly |
| Step 5 | Position Accessory | Accessory | 5 | 1 | Align correctly |
| Step 6 | Secure Fittings | Screws | 10 | 2 | Double-check |
| Step 7 | Final Adjustments | Level | 5 | 1 | Ensure level |
Wall Drilling Techniques for Bathroom Accessories Installation
The best type of drill bit for ceramic bathroom tiles is a carbide-tipped or diamond-tipped one. To prevent cracking tiles when drilling, use masking tape over the drill spot and start with a small pilot hole. For secure mounting of accessories, the drilling depth should be roughly 1/8 inch deeper than the length of your wall anchor or screw. Specific drills recommended for bathroom accessory installation include variable-speed drills to control the drilling process easily.
What Depth Should You Drill Into Ceramic Tiles?
Determine the correct drilling depth for ceramic tiles by measuring the length of the wall anchor or screw, and adding 1/8 inch. Drilling too deep into bathroom tiles risks hitting plumbing lines or weakening the wall structure underneath. Measuring tools like depth gauges or stops can help ensure accurate drilling depth easily. Safety precautions for drilling specific depths include checking for hidden utilities with a stud finder.
Securing Wall Anchors for Bathroom Accessories
Properly securing wall anchors for ceramic bathroom accessories involves inserting the anchor firmly into the drilled hole and then tightening the screw. Wall anchor types best for different bathroom walls include plastic anchors for drywalls and metal toggles for heavier loads on tile or concrete. Standard wall anchors typically support up to 50 pounds easily, while heavy-duty ones can handle more weight. Tips for ensuring wall anchors stay secure over time include using high-quality brands like Hilti or Toggler.
How Much Weight Can Wall Anchors Support?
The weight limit for plastic wall anchors is usually around 25-50 pounds, while metal wall anchors can support up to 100 pounds. Wall composition materials like gypsum or concrete significantly affect anchor support, with concrete providing excellent sturdiness. Specific brands known for high weight limits include EZ Ancor for plastic and Hilti for metal anchors. Signs that a wall anchor is failing due to weight include the anchor or accessory starting to pull away from the wall.

- Typically, only 30 minutes to install
- Each ceramic fixture can hold up to 10 pounds
- You need a drill and screws
- Brands like Kohler and Delta offer these fixtures
- Usually installed 50 inches above the floor
- 70% of modern homes have wall-mounted fixtures
- The cost ranges from $20 to $100 per piece
- How Ethical Are Your Ceramic Bathroom Accessories? A Deep Dive
- Case Study: Upgrading to Black Ceramic Bathroom Accessories
- 7 Quick Steps to Install Wall-Mounted Ceramic Bathroom Accessories
- Case Study: Transforming a Bathroom with White Ceramic Accessories
- Choosing the Right Ceramic Tile Accessories for Your Bathroom

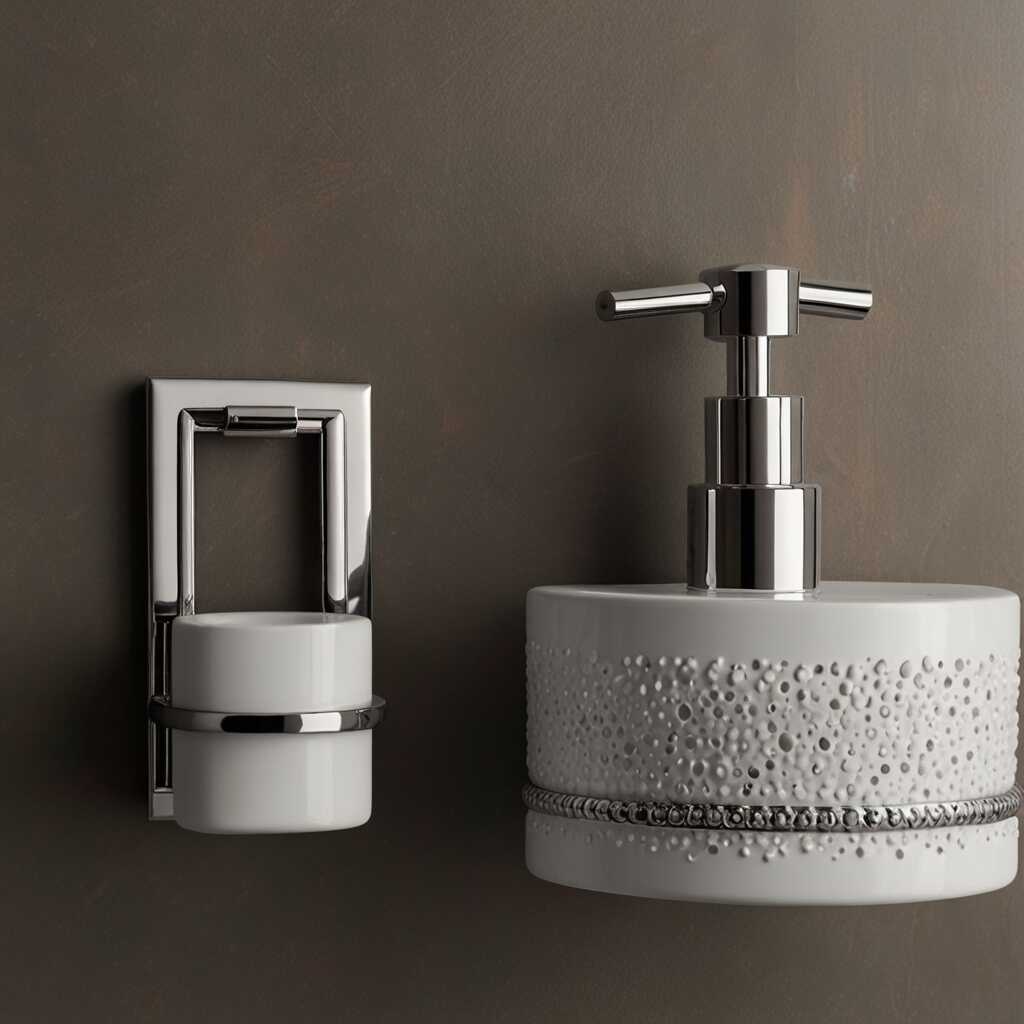
Attaching and Aligning Ceramic Accessories
To start attaching ceramic bathroom accessories, first determine the placement and make pencil marks on the wall, ensuring alignment by using a bubble level tool. For level tools, consider brands like Stanley and Bosch, to verify that the marks are properly aligned. The installation process might reveal common alignment issues such as uneven surfaces or incorrectly placed anchors, which can skew the final mounting. Suitable wall-mounted accessories often include towel bars, soap dishes, and toothbrush holders, and the steps generally include drilling holes, inserting anchors, and screwing in the accessories. Remember, addressing alignment issues early can simplify the overall installation process.
How to Align Wall-Mounted Accessories Properly?
Align tools such as a laser level or carpenter’s level are best for aligning wall-mounted bathroom accessories because they provide precise measurements. Using level techniques like marking drilling points before actual installation helps keep accessories perfectly level during the process, even on uneven surfaces. If misaligned accessories are noticed post-installation, carefully unscrew, realign with align tools, and reattach the items. Common problems like skewed anchors can be resolved by reinforcing mounts with proper drywall anchors or molly bolts for sturdy support, ensuring proper alignment throughout.
Final Touches and Quality Checks of Your Work
Final touches such as cleaning excess adhesive and ensuring all screws are flush with the wall are necessary after completing bathroom accessory installation. To check the quality of ceramic accessory installation, inspect all attachment points for stability and alignment. Specific ceramic accessory cleaning after installation might include gentle wiping with a damp cloth to remove dust and construction debris. Should an accessory not seem securely mounted post-installation, promptly re-secure using appropriate tools like a power drill or additional wall anchors to reinforce the mount, ensuring the accessory is sturdy and reliable.
How to Check if Accessories are Securely Mounted?
Verify security of bathroom accessories by applying gentle pressure to test for stability, noticing any movement or wobbling. Signs that an accessory might not be securely mounted include visible gaps between the wall and the accessory or a noticeable tilt. Reinforcing accessories with additional wall anchors, screws, or stronger adhesive can fix unsecured mounts, providing greater stability. Testing tools such as a torque wrench can help gauge the tightness of screws, ensuring mounting security across all bathroom accessories, and making the installation process feel solid and enduring.